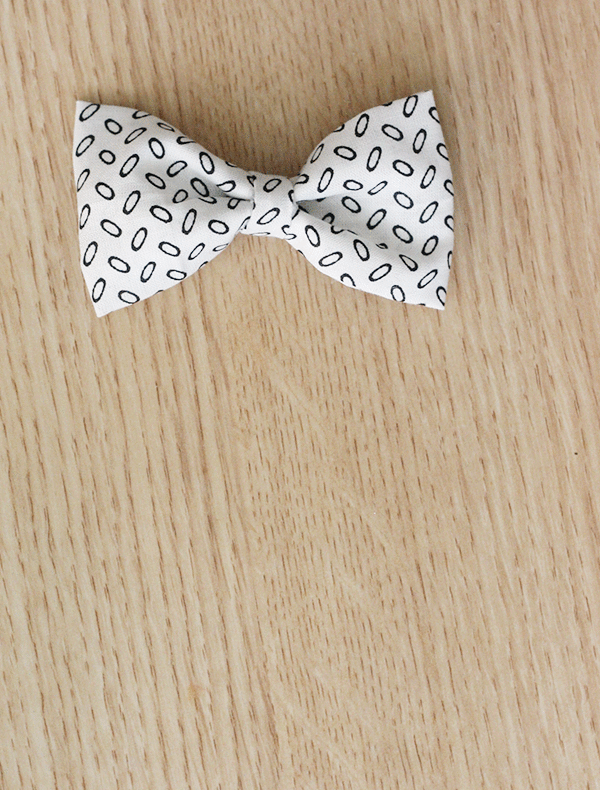
Let’s get one thing clear- Bows are in! Donning a bow look in dress or shoes is something all actresses are doing on their red carpet appearances, so why don’t we pitch in the trend and get our hair a cute little bow that’ll merely cost you a hundred rupee.
1. You’re going to want to collect all your materials. For this project you’ll need:
-Fabric
Satin or textured fabric is usually preferred to give your bow that edgy look but it’s totally your call.
-Hair Clips
Some people cover these with ribbon to make them prettier… But, no one will know the difference.
-Hot glue sticks.
Remember your glue should be strong enough as you have to apply it on the fabric.
Step 1:
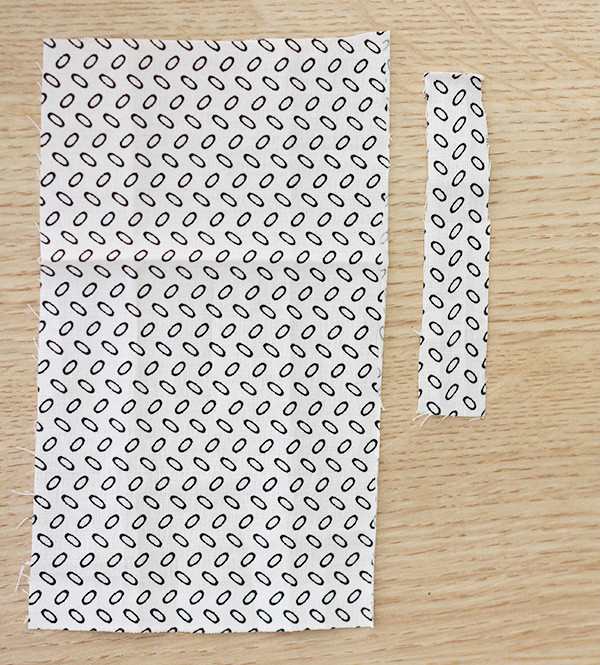
Cut two pieces of fabric (straight lines aren’t THAT important).You don’t have never measure this part, but I’d guess the bigger piece is about 7 inches long and 2.5 inches wide. The second piece is probably an inch wide, and only needs to be about 2-3 inches long. You can cut it longer than you need as it can be trimmed later.
Step 2:
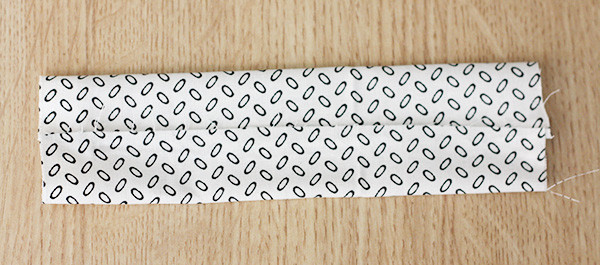
Grab your big piece and flip it so the right side is down and so that the long side of the fabric is horizontal (hotdog). Then, take the bottom and fold it up to the middle and glue it. Once that’s done, fold the top down the that middle line and glue it as well.
Now you have a long piece of fabric with pattern all around.
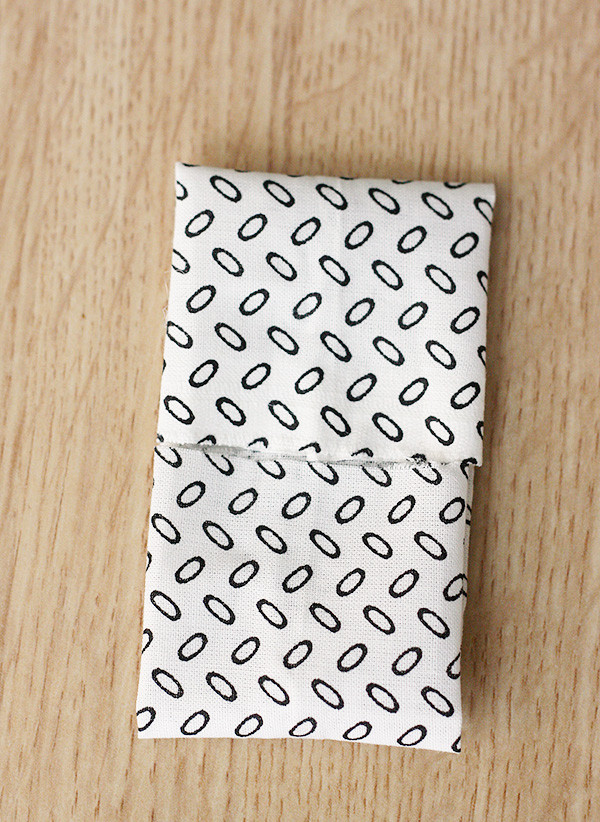
Step 3:
Now, with the seam side up–Bring in the edges to the middle just like you did in the last step. Bring one side into the middle and glue it. Repeat for the other side. Now you should have a rectangle that is about 3(ish)inches. Now set it aside for later.
Step 4:
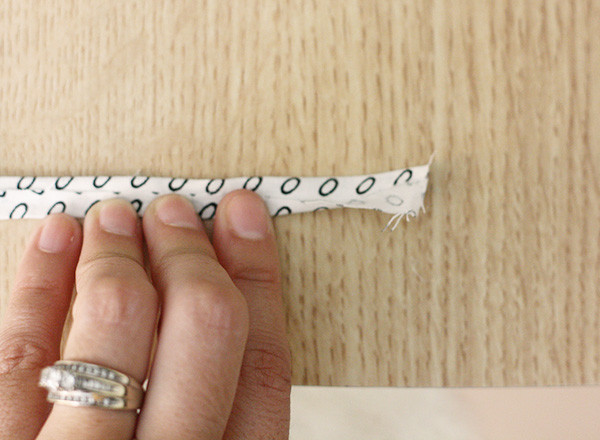
Grab your small piece and lay it right side down. Follow step two to make a thin rectangle with no wrong sides showing (pattern all around). Set it aside.
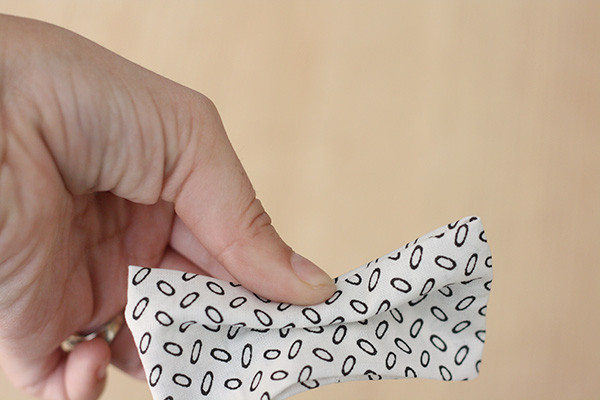
Step 5:
Grab your little rectangle again. With the side with the seam facing up, start to accordion it like you would be make a sassy paper fan. back and forth, back and forth… I can usually get about 3-5 folds in, depending on how thick the fabric is. Be sure to hold on tight as you are doing this step!
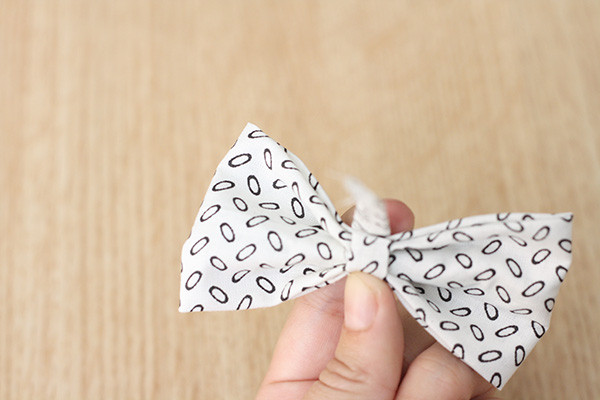
Step 6:
Put a dab of glue on the front of the accordion-ed bow. The side with the seam will be on the back.

![]()
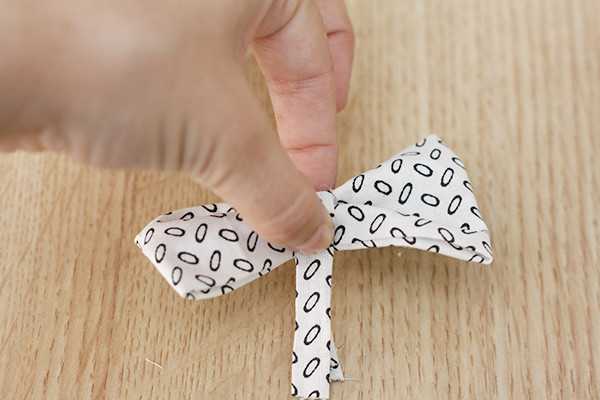
Step 7:
Glue the skinny rectangle (at the center) to the front of the bow. Be sure to keep pinching your bow together as you do this step.
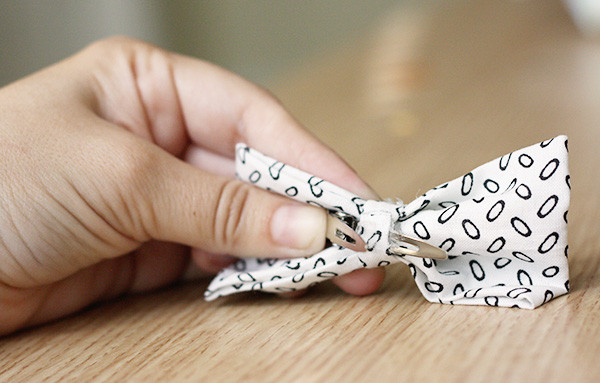
Step 8:
Add a dab of glue on top of the piece you just glued down. Now, open your alligator clip and glue just the top part in. While the glue is still wet, wrap the remaining “skinny rectangle” down and over the top of the clip. Be sure to pull it tight so the bow will stay together. Trim off excess.
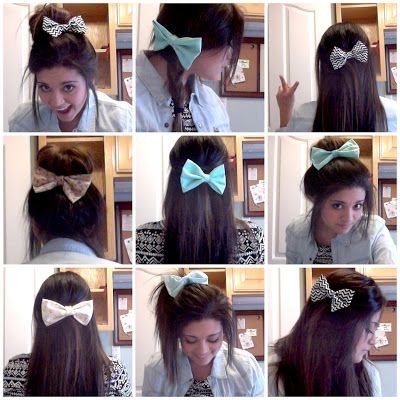
Go crafty and make like millions of them!
You can style it different ways like this:
Share Your Views